You’ve just dropped $8,000 to $15,000 on packs of imported kiln-dried Merbau, spent your entire weekend measuring, pre-drilling, and screwing down boards, and stepped back on Sunday evening with a cold beer to admire that rich reddish-brown timber.
Then comes the million-dollar question: When do you actually oil it?
Ask three different people at the trade desk and you’ll get three completely contradictory answers. Your builder mate says: "Leave it bare for 8 to 12 weeks to weather, mate." The bloke at the paint counter says: "Slap a coat on straight away before the Aussie sun bakes it." And your neighbour warns you that if you leave it through one rainy night, it will bleed red wine all over your brand-new concrete patio.
So, who is actually right?
If you slap oil on too early, the dense natural extractives trapped inside will push the coating right off, leaving you with a patchy, sticky disaster that requires stripping back with heavy sanding. But if you leave raw timber exposed to baking 38°C UV rays for months, those rich chocolate tones will bleach into a dry, splintered grey.
Here is how timber physics actually works on Australian job sites, why Merbau bleeds so aggressively, and how to get your deck coated without waiting months.
1. What Actually Happens If You Oil Merbau on Day One?
Merbau (Kwila) is one of the hardest, densest, and most naturally durable hardwoods on the planet. But that durability comes with a catch: it is completely packed with natural water-soluble tannins and dense sap oils.
Think of raw, unweathered Merbau like a dense sponge that is already frozen solid with wax.
When you brush a high-end decking oil or water-based acrylic onto brand-new boards, that coating has nowhere to go. It cannot soak past the top 0.2mm of timber pores because the wood cells are clogged with sap extractives.
Instead of soaking deep into the grain to protect the timber from moisture rot, the oil just sits on the surface as an unbonded film.
Within four to six weeks, three very frustrating things happen:
- The Sticky Nightmare: The oil refuses to cure properly, creating a tacky surface that attracts every piece of dust, pet hair, and garden debris in a 50-metre radius.
- Blistering & Peeling: The first hot day causes trapped moisture inside the core of the timber to heat up, turn into vapour, and blow the oil film right off the surface in ugly flakes.
- Black Trapped Mould: Water gets trapped underneath the half-cured oil film, reacting with the tannins to create permanent black blotches inside the timber grain.
To get oil to actually penetrate and bond, you have to flush those natural tannins out first. But that brings us to the next big hazard.
2. The "Red Wine" Bleed: Why Merbau Destroys Concrete & Light Pavers
If you’ve never seen fresh Merbau get wet, imagine dumping fifty bottles of cheap Shiraz directly onto your deck.
The moment rain hits unsealed Merbau, water dissolves the water-soluble tannins and carries them straight out of the wood cells. That run-off water turns a deep, dark reddish-brown—and it will permanently stain:
- Light-coloured concrete driveways, paths, and garage slabs
- Sandstone, travertine, or porcelain pool coping tiles
- Rendered house walls and painted brickwork
- Galvanised or powder-coated posts and stirrups underneath
If your new deck is built directly over bare dirt or a garden bed, you don’t have to worry about run-off stains. But if your deck sits next to a pool or above a paved entertaining area, leaving it to wash out naturally over 8 weeks of rain is a guaranteed disaster for your surrounding stonework.
Once the surrounding area is protected, you have two clear paths forward.
3. Option A vs Option B: The 8-Week Wait vs The 48-Hour Fast Track
You do not necessarily have to wait two to three months while your deck slowly loses its colour in the sun. Here is how the two methods stack up:
| Feature | Option A: Natural Weathering | Option B: Active Chemical Prep (Fast Track) |
|---|---|---|
| Total Wait Time | 6 to 8 Weeks (min. 4–6 rain cycles) | 24 to 48 Hours |
| Effort Required | Low (occasional hose downs) | Moderate (scrubbing with deck wash) |
| Risk of Tannin Staining | Very High (weeks of dirty run-off) | Low (tannins washed away in controlled wash) |
| UV Damage Risk | Timber starts greying before coating | Retains 100% of rich, original red/brown colour |
| Best For | Decks built over bare dirt or garden beds | Decks over concrete, balconies, pool surrounds |
How Option A (Natural Weathering) Works
If you choose the natural route, you leave the timber bare for 6 to 8 weeks. Every few days, hose the deck down thoroughly with a garden hose to draw the sap out.
The timber will open its grain, shed its surface oils, and begin to look slightly dull. Once water stops turning brown when you hose it, you’re ready to clean and coat.
How Option B (Fast-Track in One Weekend) Works
Professional deck builders don’t wait 8 weeks to hand over a finished job to a client. They use an active tannin-stripping prep cleaner (formulated with sodium percarbonate or specialised timber prep solutions like Intergrain UltraPrep Tannin & Oil Remover or Cabot's New Timber Prep).
Step 1: Wet Down the Boards
Hose down the entire timber deck with fresh water to saturate the surface wood fibres.
Step 2: Apply the Active Tannin Stripper
Mix the deck cleaner and apply it generously using a stiff-bristled deck scrubbing broom.
Step 3: Allow 15 Minutes Dwell Time
Let the solution foam and sit for 15 minutes to liquefy surface oils (do not allow it to dry out on the boards).
Step 4: Scrub & Rinse
Scrub vigorously along the grain and flush with clean water. Buckets of dark reddish-brown liquid will wash away in minutes.
Step 5: Apply Wood Brightener (Oxalic Acid)
Neutralise the chemical stripper with an oxalic acid cleaner to restore the timber's bright natural tone.
After 24 hours of warm drying weather, the timber is completely porous, free of surface oils, and ready for coating.
How can you be 100% certain the timber is ready to take oil? You do this simple 30-second test.
4. The 30-Second "Water Drop Test"
Never guess if timber is ready. Timber doesn't care what the calendar says; it only cares whether its pores are open.
Before opening any tin of oil, grab a cup of clean tap water and walk across your deck:
- Splash 5 to 10 individual water drops onto different boards across the deck (test boards in both full sun and shaded corners).
- Observe the water droplets for 30 seconds:
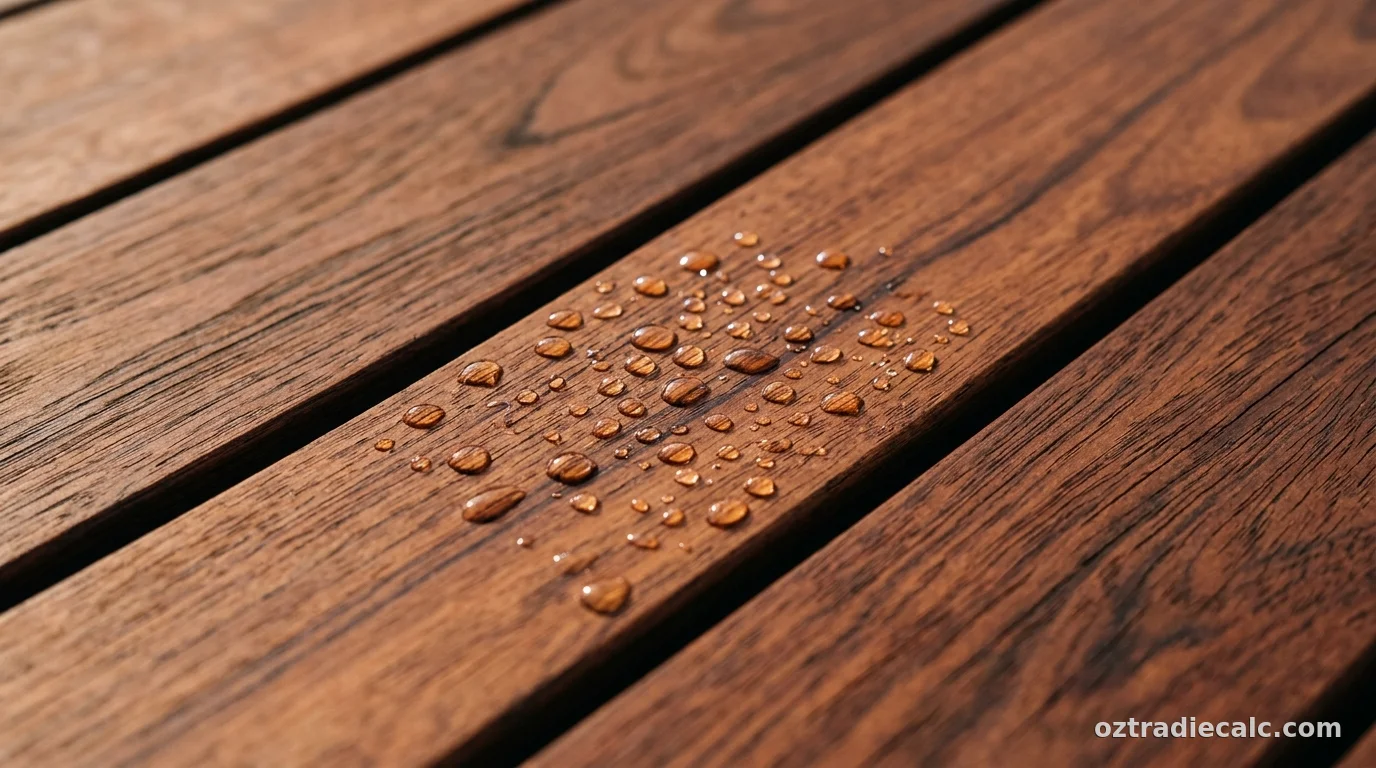
- ❌ If the water beads up into tight, rounded droplets (like rain on a freshly waxed car bonnet), the timber is NOT ready. The pores are still blocked with natural wax and oils. Any oil applied today will fail.
- ✅ If the water flattens out and absorbs into the wood within 15 to 30 seconds (leaving a dark wet patch), the pores are wide open and thirsty. Your deck is 100% ready to coat.
Once your deck passes the water drop test, the final hurdle is picking the right coating system.
5. Water-Based vs Oil-Based: What Actually Survives the Australian Sun?
Walk down the paint aisle and you’ll see dozens of cans claiming to be the ultimate finish. For Merbau in Australian conditions, the choice comes down to how often you want to do maintenance:
1. Traditional Oil-Based Penetrating Oils (e.g. Cabot's Natural Timber Oil, Feast Watson Traditional)
- The Look: Gives that classic, wet, deep-grain lustre that makes Merbau look rich and natural.
- The Downside: Traditional oils break down rapidly under harsh Aussie UV radiation. In uncovered, full-sun areas (like Sydney or Brisbane backyards), an oil-based finish will need a fresh maintenance coat every 6 to 9 months.
- Maintenance: Very easy. You just wash the deck and brush on a fresh coat without sanding.
2. Modern Water-Based Acrylates (e.g. Intergrain UltraDeck, Cabot's Aquadeck, Cutek Extreme)
- The Look: Dries to a smooth satin finish that locks in colour.
- The Upside: Lasts 2 to 3 times longer than traditional oils (typically 12 to 18 months before needing a top-up) and cleans up with plain water. It dries in just 1 to 2 hours, meaning you can easily apply two coats in a single afternoon.
- Pro Tip on Colour: Always buy oil with a "Merbau Tint" rather than crystal clear. Clear oils have almost zero UV pigmentation. The tiny tint pigments act like sunscreen for the timber, preventing the sun from bleaching the natural red tones.
6. Three Costly Mistakes That Ruin Merbau Decks
Before dipping your lambswool applicator pad into the tray, make sure you steer clear of these three common traps:
- Never use a high-pressure gurney directly on timber: Blasting raw Merbau with a 3000 PSI pressure washer will gouge the soft growth rings, tear the wood fibres, and leave your brand-new deck feeling like a rough, splintered carpet. Use a garden hose and a stiff scrubbing broom instead.
- Never oil in direct 35°C midday sun: If the boards are blazing hot, the oil will flash-dry on the surface before it has a chance to soak into the wood cells. Always oil early in the morning or late in the afternoon when the deck is in shade.
- Double-check your board spacing before sealing: Moisture movement doesn't stop once the deck is oiled. If your deck was installed with tight gaps, changing seasons will still cause expansion. If you're currently planning or laying your boards, make sure you follow our guide on Merbau Decking Gap Spacing Rules to avoid board tenting and crushed edges.
7. Step-by-Step Tradie Application Checklist
1. Check 48-Hour Weather Forecast
Ensure zero forecast rain and temperatures between 15°C and 28°C for optimal drying.
2. Cut In Edges with a Brush
Use a 75mm synthetic paintbrush to cut in board edges, perimeters, and wall joins first.
3. Apply Along Full Board Lengths
Use a lambswool applicator pad on an extension pole. Work 2 to 3 boards at a time from one end to the other to avoid lap marks.
4. Respect the Recoat Window
Apply the second coat within the manufacturer's specified recoat window (typically 2 hours for water-based or 12–24 hours for oil-based).
Planning an upcoming outdoor build or estimating timber for a new deck? Use our free Decking Calculator to calculate exact board lineal metres, fastener counts, and joist layouts, or check your subfloor framing spans with the Bearer & Joist Span Calculator.